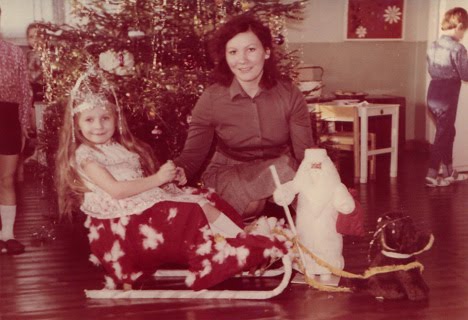
We all know that old color photo has one unpleasant property - now it looks like red. But we also know that almost nothing is impossible for Adobe Photoshop. So, in this tutorial I'll show you, how to make colors of old photo look better.

1) Open your old photo in Photoshop (File -> Open) and duplicate the layer by choosing Layer -> Duplicate Layer command or clicking on the button "Create new layer" under layers icons.
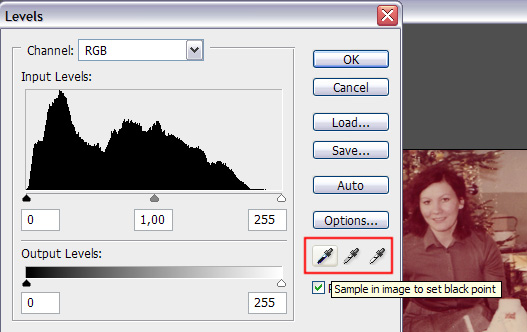
2) Go to Image -> Adjustments -> Levels and you'll see tree eyedropper tools under "Options" button. One eyedropper tool sets black point on the photo, the second sets grey point and the third - white point.

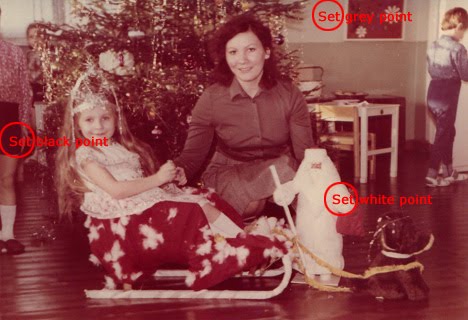
3) Look at your photo and logically try to find, what would be black, grey and white. Set this points by clicking on them with this eyedropper tools (black for black point, grey for grey point, white for white point). You can search for better point as many times as you want fot better result.

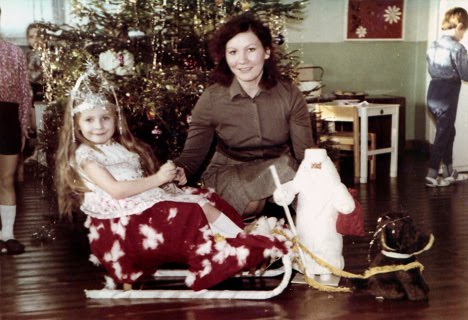
4) You can see that our photo looks much more better. The colors still are not ideal, but now you can also experiment with color balance (Image -> Adjustments -> Color Balance), selective color (Image -> Adjustments -> Selective Color), photo filters (Image -> Adjustments -> Photo Filter), etc. I've also corrected levels a little bit.

I hope you liked the tutorial and you've found it helpful. Feel free to rate and comment.

Customize & beautify your image with color correction..nice post
ReplyDeletecolour correction